Send UniFi Guest WiFi Sign-ups to Mailchimp
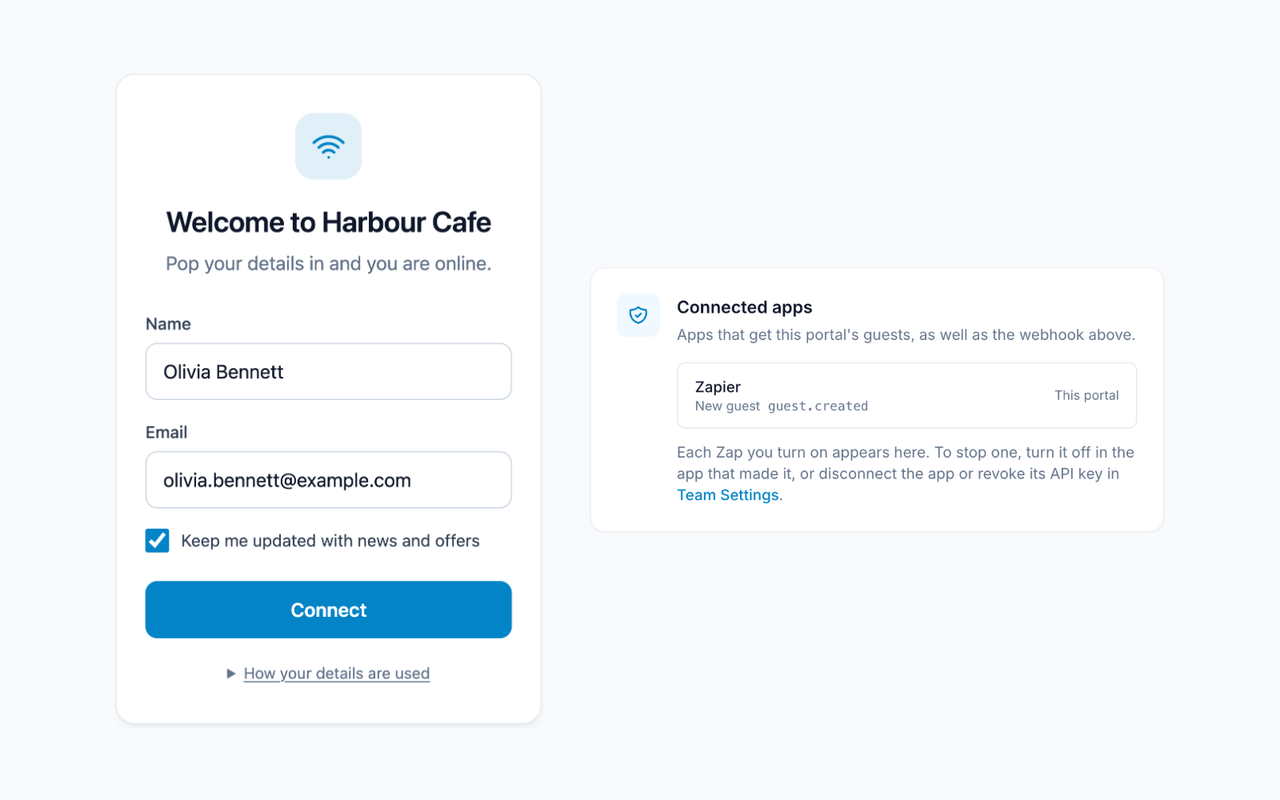
Collecting emails on your guest WiFi is only half the job. They need to end up in the tool you send your newsletter from, without anyone exporting spreadsheets every week. This guide connects a GuestGate portal on your UniFi network to Mailchimp through Zapier, so each guest who opts in is added as they sign in.
You’ll need a GuestGate portal that asks for an email address and marketing consent. If you haven’t set that up yet, start with How to collect guest emails on UniFi guest WiFi. You’ll also need a Zapier account and a Mailchimp audience.
1. Connect GuestGate to Zapier
- In GuestGate, open the team menu at the bottom of the sidebar and choose Team Settings.
- Under Connected apps, click Connect Zapier. GuestGate’s Zapier integration is invite-only for now, so this button takes you to the invite first.
- In Zapier, create a Zap and choose GuestGate as the trigger app.
- Click Sign in. A GuestGate window opens: choose your team and click Connect.
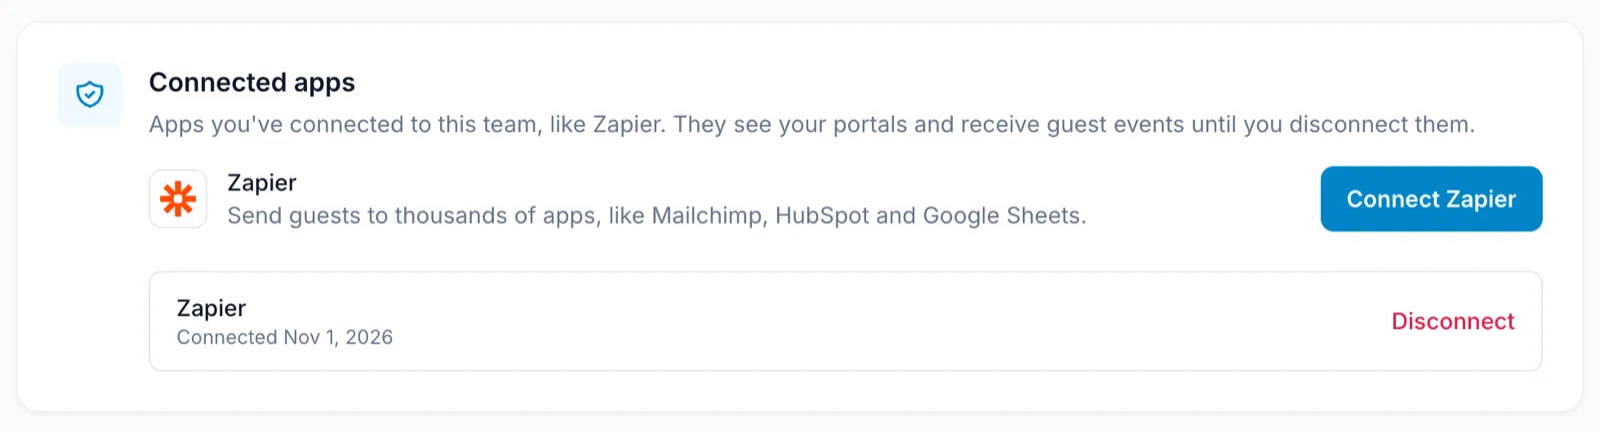
The connection belongs to your team, not to you, so it keeps working if you leave.
2. Choose the trigger
Choose New Guest as the trigger event. It runs once for each guest, the first time they sign in, which is what you want for a mailing list.
Pick the Portal for your venue, or leave it blank to include every portal, including ones you add later. Click Test trigger and Zapier shows your most recent guests, or an example guest if you don’t have any yet.
3. Only continue for guests who opted in
This step matters. Add a Filter by Zapier step that only continues when Opted In to Marketing is true. Without it, every guest would be added to your list, including the ones who didn’t agree to hear from you.
4. Add them to Mailchimp
Add a Mailchimp action and choose Add/Update Subscriber.
- Audience: your mailing list.
- Subscriber Email: the guest’s Email.
- Tag(s): the Portal Name, so you can see which venue each subscriber came from.
- First Name: the guest’s Name. It’s their full name, so if you want first and last names separately, add a Formatter by Zapier step to split it.
Test the action, then publish the Zap. The next guest who signs in and ticks the marketing box appears in Mailchimp a few seconds later.
5. Respect people who change their mind
If a returning guest signs in again and leaves the marketing box unticked, GuestGate removes their consent and tells Zapier. Make a second Zap to pass that on:
- Trigger: GuestGate, Guest Details Changed.
- Filter: only continue when Previously Opted In is true and Opted In to Marketing is false.
- Action: Mailchimp, Unsubscribe Email, with the guest’s Email.
If a guest asks to be forgotten and you delete them in GuestGate, the Guest Deleted trigger lets you remove them from Mailchimp too.
Seeing it from your portal
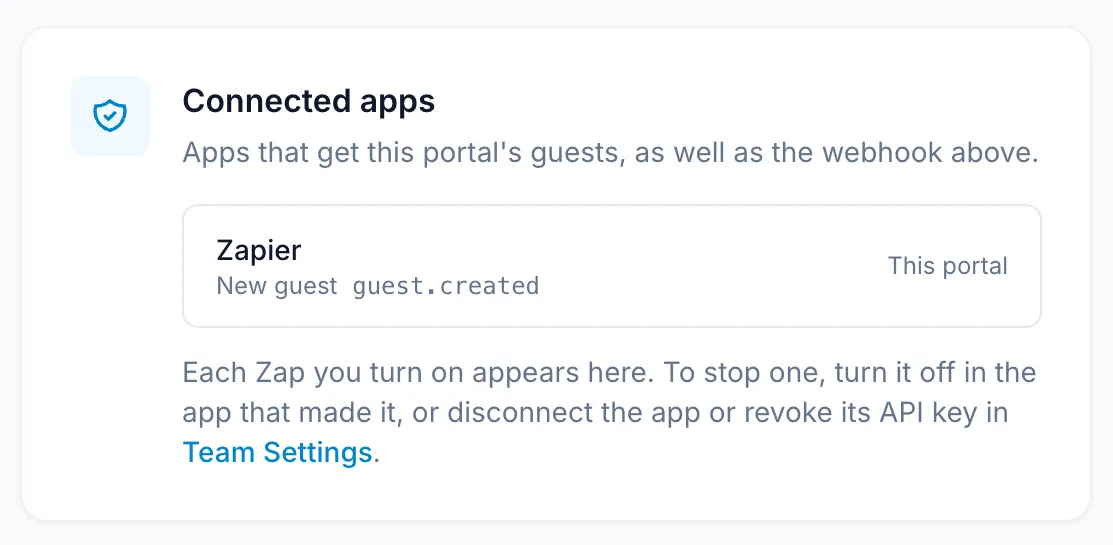
Each portal’s settings in GuestGate have a Connected apps card listing every Zap that gets that portal’s guests, and for which event. It’s a quick way to check what’s switched on for each venue.
The same pattern for other tools
Swap the Mailchimp step for whichever tool you use:
- HubSpot: Create or Update Contact, with the email, name and a property for the venue.
- Google Sheets: Create Spreadsheet Row, to keep a running list your team can share.
- Klaviyo, Brevo or ActiveCampaign: use their action for adding or updating a subscriber, the same way as Mailchimp.
Keep the opt-in filter for anything you’ll send marketing from. The Zapier guide in the docs lists every trigger and field.
Prefer to skip Zapier?
GuestGate can also send every guest event straight to your own systems with signed webhooks. And if Mailchimp is all you need, tell us on our integrations page: a direct Mailchimp connection is on the way.
Try it
GuestGate has a 14-day free trial with every feature, including Zapier, and you don’t need a card to start. Create your account and your first guests can be in Mailchimp today.