UniFi Captive Portal Without Port Forwarding
UniFi’s built-in hotspot is fine for a WiFi password or vouchers. As soon as you want your own login page, one that asks for an email address or looks like your venue, you need an external captive portal. That’s where most setups run into port forwarding.
Why external portals usually need an open port
An external portal has two jobs. It shows the guest a login page, and when the guest signs in, it tells your UniFi console to let their device online.
The first job is easy, because the guest’s phone loads the page from the internet. The second job is the problem. Most portal services talk to your console the old way: they sign in to UniFi Network with a username and password, then send it a command. To do that, they need to reach the console from the internet.
In practice that means some combination of:
- A port forward on your router, usually to port 443 or 8443.
- A fixed public IP address, or a dynamic DNS name that keeps up when it changes.
- A local admin account on the console, because UniFi now requires MFA for every other kind of login.
Each of those is a job for whoever set up the network, and each one can break. An ISP changes your IP address, a router is replaced, or someone tidies up the admin accounts, and guests can’t get online. And if your connection is behind CGNAT, as Starlink and many mobile and rural broadband connections are, you can’t forward a port at all.
How GuestGate avoids it
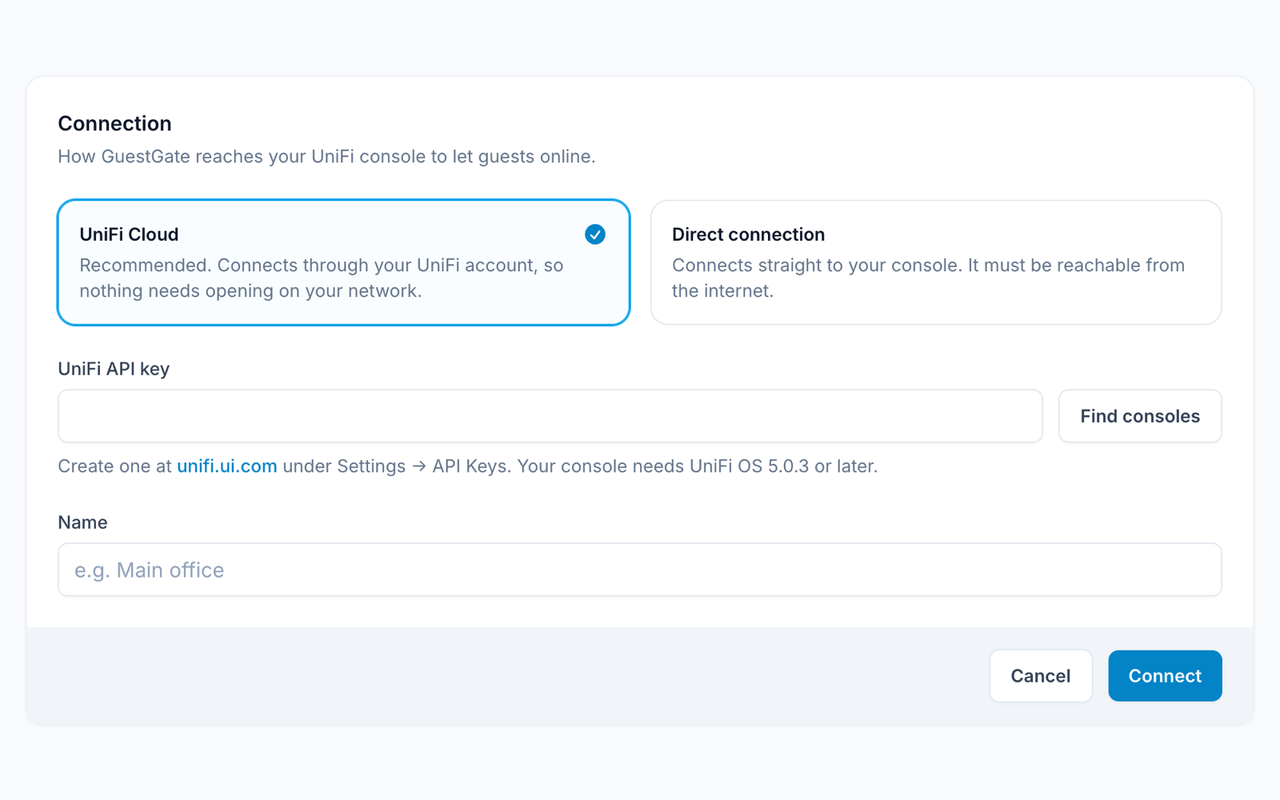
GuestGate uses UniFi’s official API instead of an admin login. You create an API key in your UniFi account, and GuestGate sends its requests through UniFi’s own cloud connector.
Your console already keeps a connection open to UniFi’s cloud, the same one that lets you manage it from the UniFi app or unifi.ui.com. GuestGate’s requests travel down that existing connection. Nothing new has to be opened on your network, and it doesn’t matter what your public IP address is.
Because it’s an API key rather than a username and password, MFA doesn’t get in the way either. The key only gives access to what you choose when you create it, and you can revoke it at any time.
Setting it up
It takes a few minutes. The Connect UniFi guide has every step, but in brief:
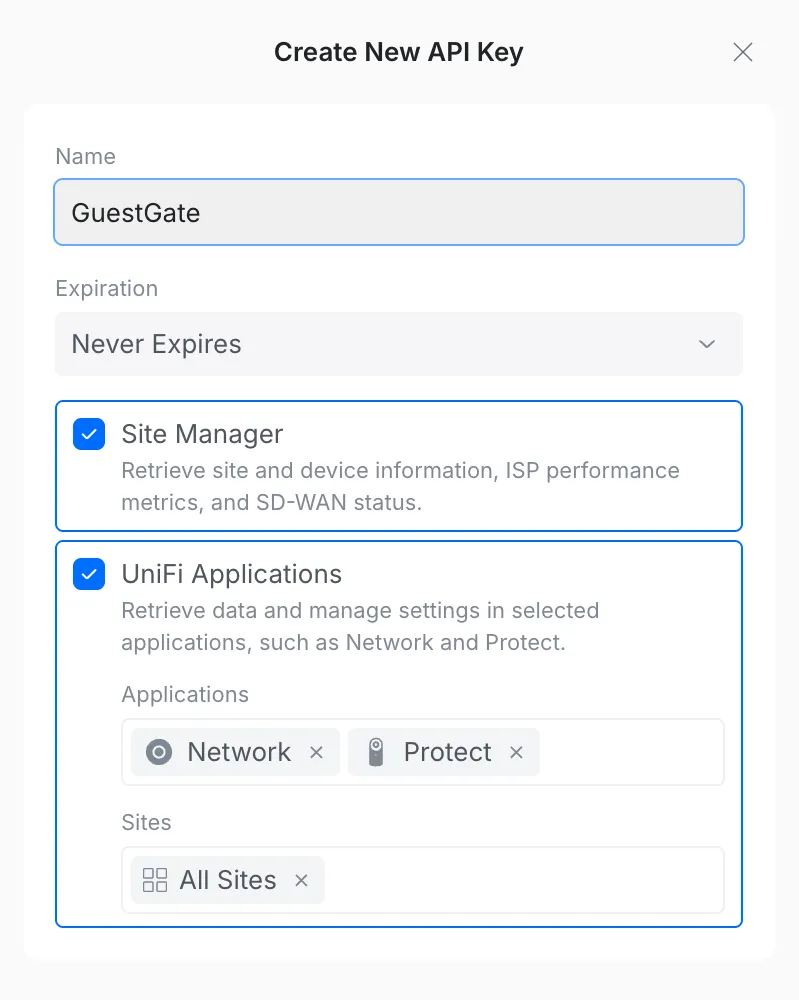
- Sign in at unifi.ui.com, open Settings, then API Keys, and create a key with UniFi Applications and Network ticked. Set it to never expire, so guests aren’t locked out when a key runs out.
- In GuestGate, open Controllers, click Connect, choose UniFi Cloud and paste the key.
- Pick your console from the list and click Connect.
- Create a portal for the site, then point your UniFi guest network at it. Set up the UniFi hotspot shows exactly which settings to change.
Your console needs UniFi OS 5.0.3 or later, and it needs to be on a UniFi account. Self-hosted UniFi Network servers can’t use the cloud connector. If you’d rather not go through UniFi’s cloud, GuestGate can also connect straight to the console, but that does mean making it reachable from the internet.
What you still set up in UniFi
The guest’s phone still has to be able to load your login page before it’s online. UniFi handles that with two settings on the hotspot landing page: the external portal address, and a pre-authorisation allowance for GuestGate’s address. Neither needs anything opening on your router, because the guest’s phone is reaching out, not the internet reaching in.
Keeping an eye on it
GuestGate checks each connection every ten minutes. If guests haven’t been able to log in for half an hour, because a key was revoked or the console went offline, it emails the team owner and administrators with what’s wrong and how to fix it.
Related guides
- How to collect guest emails on UniFi guest WiFi
- Guest WiFi captive portal behind CGNAT or Starlink
- UniFi external portal “error 499” and MFA
Try it
GuestGate has a 14-day free trial with every feature, and you don’t need a card to start. Create your account and connect your console in a few minutes.